Perspective: Process Journal
Introduction to Digital Photography
It was the exact moment when I answered"Sharpened Perspective" in place of steepened perspective on our Friday exam, I knew I was in trouble. Then again at 11 o'clock on Monday night, and after an entire day of shooting I flicked through the images only to realise none of these were up to par. At least for my standards. So I woke with the sun this morning in desperate attempts get back out there and try for anything I could be more happy with. I rubbed the blur out of my eyes enough to squint through my lens as the sun rose, and pointed the end of my camera to buildings, and trees and rocks and people and dogs. My theme was 'By The Beach', as these photos were all taken by the ocean, without actually showing the ocean. Tricky, yes. Brilliant, maybe? (Probably not.)
Alas, see below for four images displaying Steepened and Flattened Perspective.
Flattened Perspective
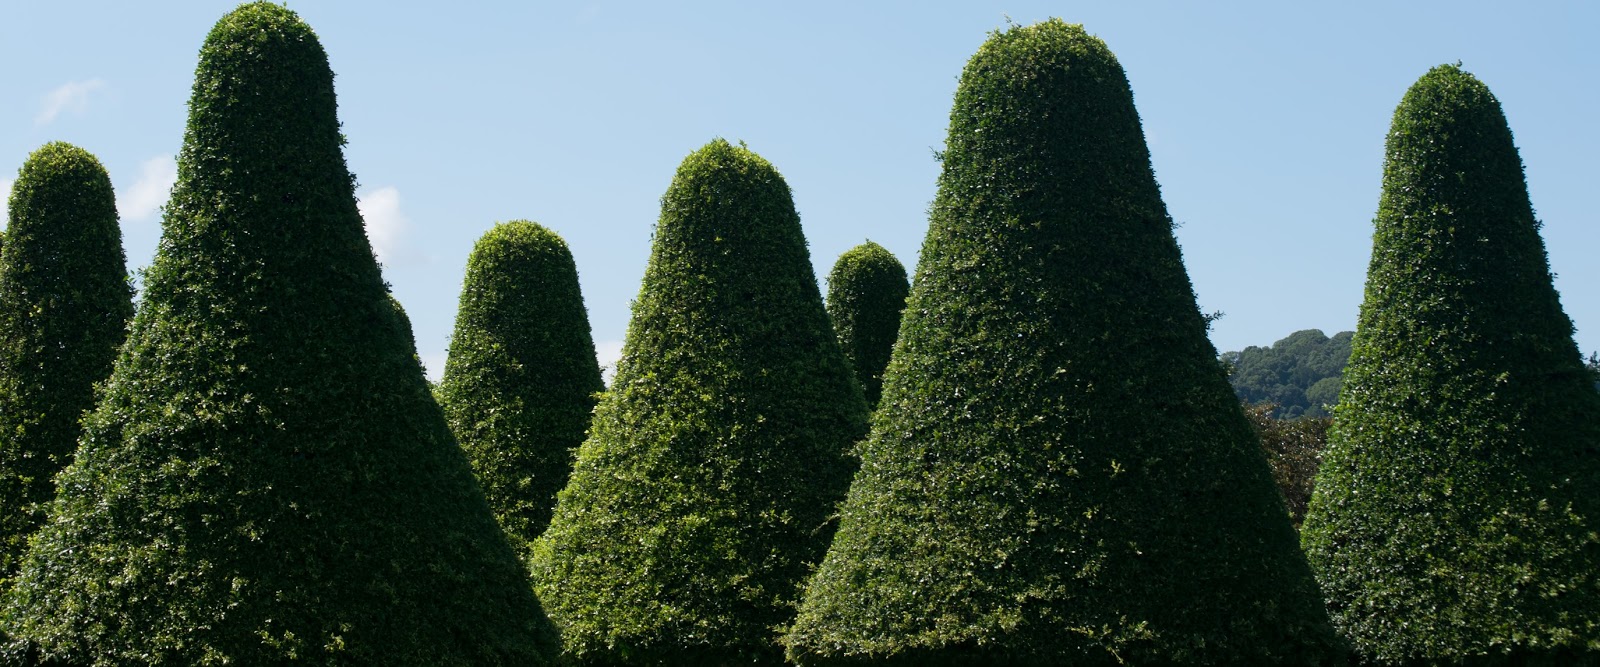
Nikon D5300 | 55mm-200mm | at 55mm
ISO 100 | f 14 | 1/200
Flattened
Flattened

Nikon D5300 | 55mm-200mm | at 200mm
ISO 400 | f 5.6 | 1/1000
Flattened
Flattened
Analysis
The aim of flattened perspective is to compress all subjects in a single frame where there is no size difference. This is achieved by using a telephoto zoom lens from a far distance; the further you are the better. I chose to use a telephoto lens for this exercise.The first image of the flattened perspective was taken from a distance of approximately 20-30 meters. The subjects themselves were about 10-15 meters high so the biggest challenge was getting everything in frame and avoiding any clutter in the back ground.
For this image an 18-55mm lens was used initially, it was on reviewal of this when it became apparent that a 55-200mm lens would create optimum results. For this image an ISO of 100 was the best choice as the sun was bright and no clouds were casting shadows. With an aperture of f 14 partnered with a 1/200 shutter speed cripst imaging enhanced the vibrant tones in this image. In post-production the image was cropped to take out the blue sky, this was done to dramatize the flattened perspective on the tree tops. A lower, vertical view point was experimented with for this scene however didn't assist with accurately displaying a flattened perspective. A horizontal viewpoint of the base of the trees was also trialed however the final image above was a winner for encompassing all elements associated with flattened perspective.
The second image for flattened perspective is probably the most interesting to me of the entire assignment. This image, taken on a 55-200mm telephoto lens, had the furthest distance of lens to subject ratio. This photo was shot with a distance of approximately 500 meters to 1 km between subject and lens. The building being on the Southport/Labrador Broadwater and the photo taken from across the river on The Spit. The lens was set to 200mm which enabled the ability to zoom past the water and directly onto the building, compressing the subjects. Inspired by the storm clouds above, the ISO was set to 400 as showcasing the contrast of dark colours onto the blue tones of the building added a dynamic feel to the image. With a shutter speed of 1/1000 and an aperture of f 5.6 the image remained crisp, but compressed, and took advantage of the dark clouds.
The testing factor in achieve flattened perspective was balancing an equal subject- distance ratio. This is evident with the two images above. The image with the biggest distance more accurately showcases a flattened perspective, yet in the first image it is still noticeable but could be enhanced by creating a larger distance between subject and camera. The view points used for these images, along with the techniques in exposure were successful in developing a flattened perspective.
Steepened Perspective

Nikon D5300 | 55mm-200mm | at 55mm
ISO 200 | f 4 | 1/500
Steepened

Nikon D5300 | 55mm-200mm | at 55mm
ISO 200 | f 22 | 1/100
Steepened
Analysis
Steepened perspective is used in the aim of making subjects in the foreground appear much bigger than those behind it. This is done by shallowing the distance between the subject and the camera; the closer you are the better. Using a wide angle lens for this exercise is good practice, however not essential. I chose to use a telephoto lens for this component, compared to the wide angle lens, as I was able to control depth of field with more ease. On reflection, this was a poor decision as I am able to see flaws in these images and perspectives that can be avoided by using the wide angle lens. For example, if the wider lens had been used these two images would be less compressed and would be able to outline the steepened spaces more dramatically. In spite of this, it is still evident to see that a steepened perspective was purposefully used.
In these two images, the key subjects both in the middle-to right rule of thirds, hold the main focus point in order to dramatise the size ratio from the first post/tree towards the background of the image. This is staple in recognizing steepened perspective images. In order to get this perspective many different angles were trialed; the best angle having the camera level to the bottom of the subject. In the second image this was achieved by laying on the grass directly in front of the subject with the end of the lens approximately 20cm away from the post. For this image and aperture of f 22 was used to soften the background and emphasise the main subject, but still have the image clear enough to accentuate the steepened perspective.
The first image, although similar to the second, was taken using different view points. In this case the subject is framed closer within the image, this was done in order to fit more detail into the background to emphasise a steepened perspective. This photo was initially taken horizontally however it became apparent during review that a vertical layout enhanced the photo more than the horizontal. Multiple view points were taken to achieve this image including both horizontal and vertical but also the distance between the foreground subject and camera, trialling depth of field, and composition.
An ISO 200 was used to capture the early morning lighting, the shadows were used in favour of this shot as they enhanced the tones of the trees, yet still had light rays hitting the mid to base of the trunk. A shutter speed of 1/500 captured this promptly and evenly leaving the image well exposed.
The techniques used in capturing these images provided a successful approach to steepened perspective. The correct framing of the foreground subjects allowed for eyes to be drawn down through the image from right to left. These images achieve a steepened perspective by encompassing all of the mentioned techniques.
Exemplars
 |
| Peter Van Agetmael |
 |
| Harry Gruyaert |
 |
| Dean Sewell |
Inspiration
The first image in these examples caught my attention through the simplicity of the image. There is little detail in the photo yet it has a great dynamic effect. The composition of the fence being slightly off-center with a steepened perspective allowed me to easily understand how such a perspective can be achieved by the use of minimalism.
The contrast of the storm clouds and ocean in the second image grabbed my attention by the crisp horizon line breaking the black tones to truly distinguish each element of those tones. The rule of thirds used in the photograph is dynamic and attention grabbing. The inspiration from this image reflected in my second submission for flattened perspective.
The third image, though similar to Gruyaert's image inspired me to find different ways to compose an image when experimenting with dark contrasting colours. The white snow breaking the contrast in the bottom of the image here catches my eye. The most dynamic part of this image is how Sewell used over 2/3's of the frame for the smoke. This leaves the image dynamic and gives plenty of detail to see yet still has a minimalistic view.